


Make a Gratitude Journal for a Student
However you choose to make it, you both will benefit

In the past few days I’ve come upon the word “gratitude” in several places. This coincidence got my attention.
First, I came upon “gratitude” in bright chalk on a public sidewalk. The words and drawings there supported students in this time of serious social and mental health challenges. The community mural-making event was called “Through Grief to Gratitude”.
And then I happened to learn about “gratitude journaling” in We Gather Together, a library book.
Putting my two sightings together, I decided to make a journal for students. I wanted it to be an inspiring, creative way for a young person to explore their world through their own words.
One section of my journal encourages frequent expression of gratitude, which has been shown to help counter negativity:
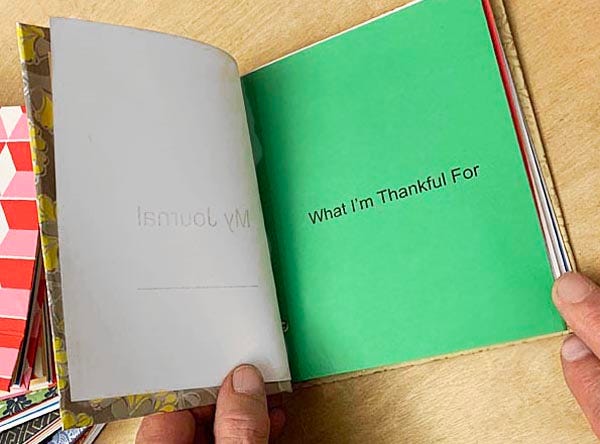
Sam and I decided to make journals for our six grandchildren, ages 11 to 19, for the holidays. If you would like to make one for a child, a teen, or a friend, here are my instructions. Please change anything you like, to make it enjoyable.
Remember, handmade is not perfect. That’s what makes handmade a perfect gift!
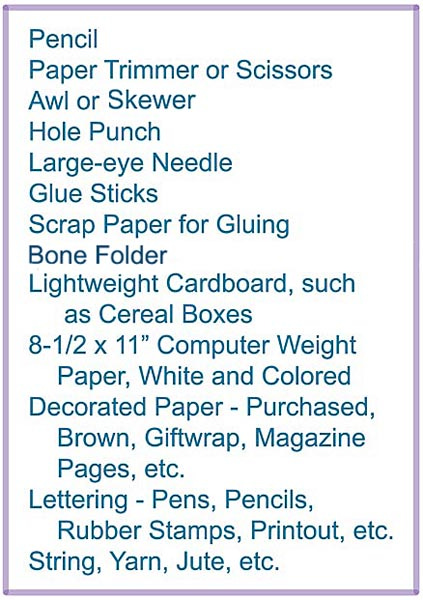
Journal-Making Materials:
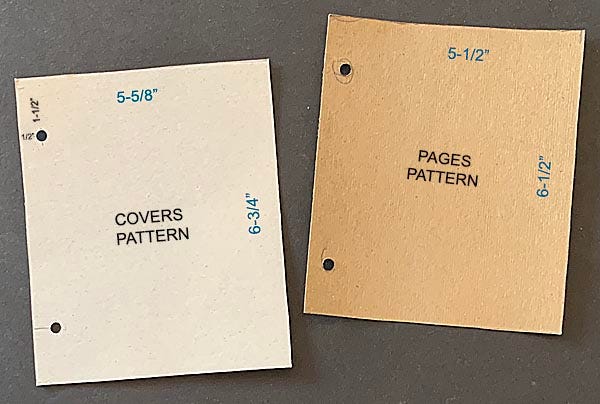
First, Make a Cover Pattern:
Make a Cover Pattern 5-5/8” wide by 6-3/4” high. I used cardboard from a cereal box, but you can use whatever you have. Punch 2 holes. I located mine 1/2” from the left side edge and 1-1/2” in from the top and bottom edges.
Make a Pages Pattern:
Make a Pages Pattern 5-1/2” wide by 6-1/2” high, out of cardboard. Position Pages Pattern under Cover Pattern so there are small margins at top, bottom and right side. Trace the 2 holes onto your Pages Pattern with a pencil. Punch the holes.
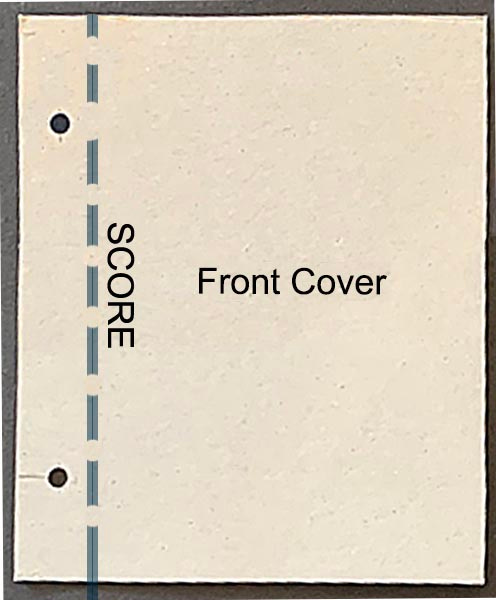
Make the Front and Back Covers:
Onto cardboard (I used cereal box cardboard for the Covers), trace the Cover Pattern 2 times. Put the shiny sides of the Cover cardboards down. (You will glue paper on the non-shiny side.) Place the Pattern’s holes on the right side of the Front Cover, and on the left side of the Back Cover (see below). With a straightedge and something like a bone folder, score the Front Cover about 1” in from the edge with the holes; gently fold back to make the Front Cover open easily.
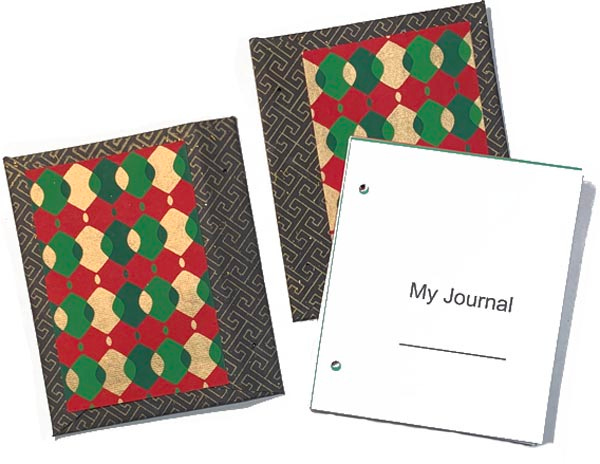
Cut Decorated Papers for the 2 Covers:
For the 2 Outside Cover Papers, I used Decorated Paper from a craft store, but you can use gift-wrap paper, brown paper, computer paper, magazine pages, etc. Cut 2 pieces large enough to wrap flaps around Front and Back Covers, generously covering the holes. Cut the Decorated Paper flaps and trim the corners, but not right up to the cardboard Cover corners. Fold the flaps over and glue them down.
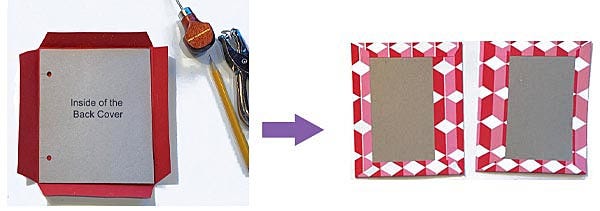
Cut Colored Paper Rectangles for the Insides of the Covers
For the 2 Inside Cover Papers, measure and cut 2 matching, computer-weight papers, and glue them over the flap edges, leaving a margin of Decorated Cover Paper showing (see below).
Punch Holes through Decorated Cover Paper: Locate and mark where the cover holes are, and punch small holes in Front and Back Covers. I used an awl.
Make the Blank Pages:
I used white computer paper, cutting two 5-1/2” by 6-1/2” Pages from each 8-1/2” by 11” sheet. To cut, you can use a paper trimmer; or a craft knife, a metal straightedge and a cutting board; or you can measure and lightly draw pencil lines and cut with scissors. I used 40 sheets of white paper cut into 80 Blank Pages (20 Blank Pages per Section), but 20 sheets of white paper cut into 40 Blank Pages is fine, too (10 Blank Pages per Section). To punch holes: stack 3 or 4 Pages. Using the Pages Pattern, with a pencil, mark holes on the top Page of the stack. Punch holes through the stack with the hole punch. (You can punch more Pages at once if you use a large multi-hole punch.)
Make a Title Page and 4 Section-Heading Pages:
My Title Page is white computer paper, and my 4 Section-Heading Pages are 4 different bright colors, the same weight as the white paper. For Lettering on these 5 Pages, you can hand-print with markers, colored pencils, gel pens or ink pens. Or you can use rubber-stamp alphabet letters. Or compose the words on a basic computer program and print out on 8-1/2” by 11” paper, 2 pages per sheet (as I did). Then use your Pages Pattern to mark, cut, and punch holes with the hole punch.

Put the Journal Together:
Arrange the Pages: Title Page + Section-Heading Page + 20 (or 10) Blank Pages; repeat 3 more times. Add Front and Back Covers. Line everything up by tapping the stack on a tabletop, with hole-edged sides down. The top, bottom, and other side will be slightly set inside the covers, leaving margins. You can binder-clip the stack or just hold it tight, ready for sewing together.
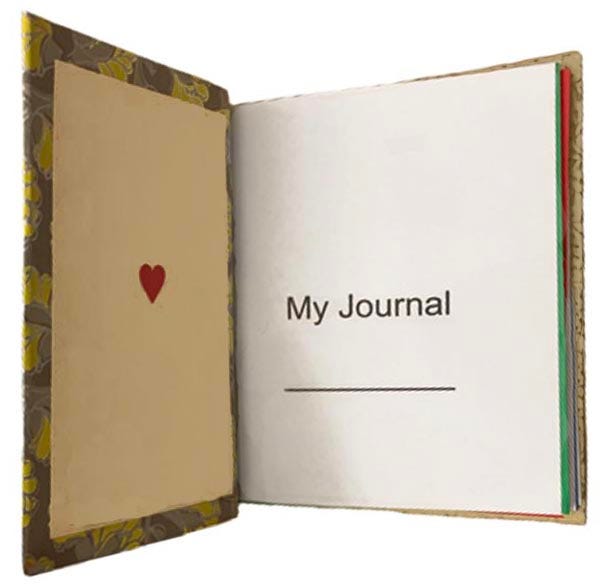
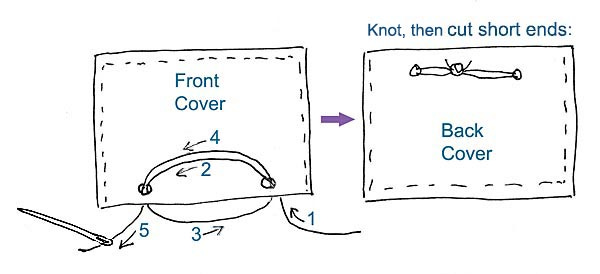
Sew the book: Cut about 26” of binding string such as embroidery threads, yarn, jute, ribbon, whatever you have on hand. For my journals, I used thick cotton string, and also some nubby, sparkly yarn. With a large-eyed needle, sew the stack together. I went around through the holes twice. (See diagram below.) Gently pull the strings taut but not too tight (so the book opens comfortably), tie a triple-knot on the back, and cut the ends short. Open the journal and glue one or two small surprise hearts to the inside covers.

You are done.
Now enjoy holding the beautiful gift you have made. Then pass it along to someone who is just waiting to discover, in their own written words and drawings, who they really are and the person they want to become.

I am grateful for your friendship, Deda. It has been a joy to experience and appreciate all your many creative talents. Happy Holidays to you and Sam.
Creative and Kind - like you! Happy Holidays!